How to Build a Contact Form with JavaScript and NodeMailer

I'm a solutions engineer lead, GitHub Star, Director of WomenDevsSG, and co founder of ragTech. I work at the intersection of tech, systems, and leadership, and this blog is where I share my journey through all three. Expect honest reflections, real experiences, and thoughts that are still forming rather than polished career advice.
Hello everyone! This article is dedicated to Oluwaseun Dabiri, as requested. I'm quite busy this week to write on a short moment's notice but I somehow managed to write and build this mini project. If you are reading this, I hope it helps. I didn't have much time to proofread so please let me know if there are any code or written typos.
This article is the alternate pure vanilla JavaScript version of my Build a Contact Form with React and NodeMailer article. Also, this version will cover more details so it's more beginner-friendly.
In this tutorial, I'll be going through step-by-step on how build a simple contact form using JavaScript and NodeMailer.
Some prerequisites that are helpful:
Good knowledge in HTML and JavaScript
Basic knowledge in back-end programming with Node and Express
Step 1: Build the HTML
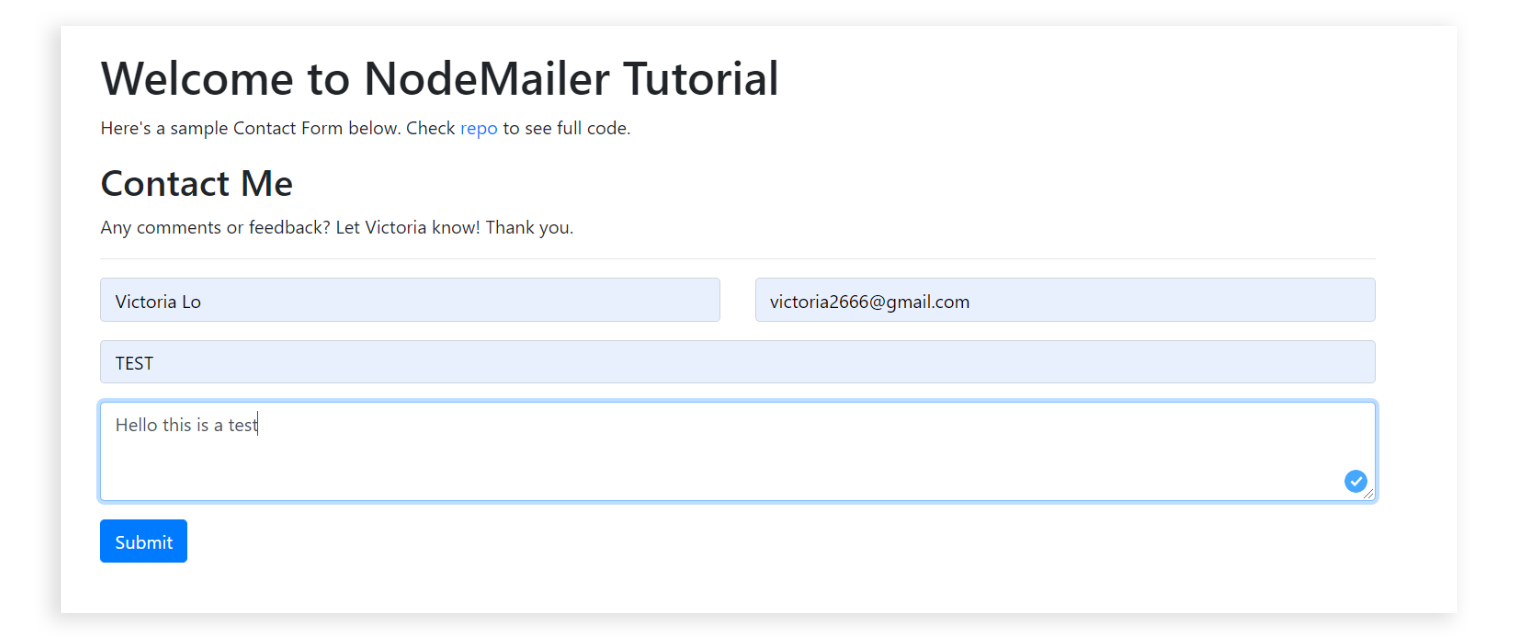
Create a html page for the contact form. You can create and style it however you want. I'm using Bootstrap. For this example, here's my contact form:

Important things to note
1. The Form Element
For the HTML of the contact form, make sure the form element contains the following attributes:
id: can be anything you want. For my example, it's 'contact-form'method = POST: because we are sending form data to the serveraction = "send": this is the url we are posting to for this exampleenctype = "multipart/form-data": this makes sure that the data will be sent in this format
2. The Input Elements
Any input elements inside the form must have a name attribute, which is needed to reference form data upon submitting. A required attribute is also recommended to make sure the user will not leave a field blank.
3. The Button Element
The button will be used to submit the form. Make sure it is inside the form element. It should have 2 attributes:
type="submit": specifies that it is used to submit a formvalue="submit": sets the initial value of the button
You can find the full HTML code in my repo.
Step 2: Client-Side Functions
Now that we have a contact form, let's add some code to send the form from the client to the server. We will be using the Fetch API to POST our form data to our server.
Create a js file in the same directory as your html, mine will simply be called index.js but you name it anything you want. Remember to add it as script into your .html page.
In this script, we will do the following:
Create an event listener for when the user submits the form.
When the event is triggered, create a FormData object called
mailbased on theinputvalues and theirnameattributes in the form.Call a function called
sendMail()withmailpassed as a parameter. This function will use Fetch API to post themailto the urlsend(specified in ourformelement attribute).
Let's see what it looks like in code:
//get the form by its id
const form = document.getElementById("contact-form");

//1.
const formEvent = form.addEventListener("submit", (event) => {
  event.preventDefault();

  //2.
  let mail = new FormData(form);

  //3.
  sendMail(mail);
})
Next, let's take a look at the sendMail() function:
Supply the base url with
/sendfor the fetch().Specify the method as
postsince we are sending data, not getting.Specify the body as
mailbecause we are sending this data in our request
Here's what the sendMail() function looks like:
const sendMail = (mail) => {
  //1.
  fetch("/send", {
    method: "post", //2.
    body: mail, //3.

  }).then((response) => {
    return response.json();
  });
};
Great! The client-side is done. Let's now set up our server to receive our form and use Nodemailer to send emails.
Step 3: Install Nodemailer and other dependencies
First run the following to initialize a package.json in the root directory of the project.
npm init
Then install the following dependencies:
Express: Node.js web framework
Nodemailer: a module to send emails
dotenv: allows use of environment variables
multiparty: parses form data for Node.js apps
Install the dependencies by running:
npm install express nodemailer dotenv multiparty
Step 4: Create server.js
In the root directory of your project, create a server.js file. In the first lines, we should import our dependencies:
const express = require("express");
const nodemailer = require("nodemailer");
const multiparty = require("multiparty");
require("dotenv").config();
And then initialize our app with Express:
// instantiate an express app
const app = express();

//make the contact page the the first page on the app
app.route("/").get(function (req, res) {
  res.sendFile(process.cwd() + "/public/index.html");
});

//port will be 5000 for testing
const PORT = process.env.PORT || 5000;
app.listen(PORT, () => {
  console.log(`Listening on port ${PORT}...`);
});
Step 5: Set up Nodemailer and POST Route
Now all there's left to do is to set up the POST route to receive the submitted form data, parse it and send it via Nodemailer.
First, create a transporter object using SMTP (Simple Mail Transfer Protocol). It has the following properties:
1. host
The host depends on the email service you are using. Some common ones:
Gmail: smtp.gmail.com
Outlook: smtp-mail.outlook.com
Hotmail: smtp.live.com
2. port
Set to 587 by default but feel free to check out this article to learn which port number is best for your email.
3. auth
Next, we provide the credentials needed to authorize Nodemailer to use your email as the sender. Since these are private information, they will be stored in the .env file as environment variables.
Altogether, here's the transporter object for my example (I'm using a hotmail email address).
const transporter = nodemailer.createTransport({
  host: "smtp.live.com", //replace with your email provider
  port: 587,
  auth: {
    user: process.env.EMAIL,
    pass: process.env.PASS,
  },
});
Note: Gmail users need to allow third party access to let Nodemailer send emails. So turn on the 'Less Secure Apps' settings by following instructions here.
Now we have our transporter object. Next, we need to verify this connection to make the credentials are correct and Nodemailer is authorized to send emails from that address.
// verify connection configuration
transporter.verify(function (error, success) {
  if (error) {
    console.log(error);
  } else {
    console.log("Server is ready to take our messages");
  }
});
Finally, we create our POST route to do the following:
Accepts the form data submitted and parse it using
multiparty.After parsing it, create a
mailobject withfrom,to,subjectandtextproperties.Use
transporter.sendMail()to send the email and done.
Here's what the code looks like:
app.post("/send", (req, res) => {
  //1.
  let form = new multiparty.Form();
  let data = {};
  form.parse(req, function (err, fields) {
    console.log(fields);
    Object.keys(fields).forEach(function (property) {
      data[property] = fields[property].toString();
    });

    //2. You can configure the object however you want
    const mail = {
      from: data.name,
      to: process.env.EMAIL,
      subject: data.subject,
      text: `${data.name} <${data.email}> \n${data.message}`,
    };

    //3.
    transporter.sendMail(mail, (err, data) => {
      if (err) {
        console.log(err);
        res.status(500).send("Something went wrong.");
      } else {
        res.status(200).send("Email successfully sent to recipient!");
      }
    });
  });
});
Let's test it!
I entered and submitted the form.
Here's the email I received in my hotmail account, as you can see, it works!

And that's Nodemailer!
Thanks for reading till the end. I hope this article has been helpful in setting your own mail sending app using Nodemailer. If it does help, please leave a like or a share. Also, feel free to leave any thoughts or questions you have about Nodemailer in the comments. Visit the repo to view the full code. Thanks and till next time, cheers!
Update: Demo site has been removed due to unwanted spams. Will return error 404 if you try to access. Apologies for the inconvenience.